This is a fun one. I’ve been playing Grand Theft Auto V Online for a few months now and if you’ve ever played it, you know that you have to find ways to grind for money and RP in the game. There are a few ways, especially when there are 2x missions happening to get some good money and during those weeks making a few million in a week is pretty easy. A friend in the game I met doing this found a user created mission that averages 42k-68k per mission and last’s 30 minutes. Because of the unique way the mission is set up, you can run it un attended for about 12 minutes and every 30 minutes you need to start again.
Since my new friend is already at the computer, they offered to host and restart the mission and I could basically not idle and make money. Over all it’s good for them and good for me and since the offer was on the table, all I had to do was keep my game from idling and was untethered from the computer while collecting the funds for all the goodies in the game. My engineering mind went to work and this is what I came up with.
Why Mechanical
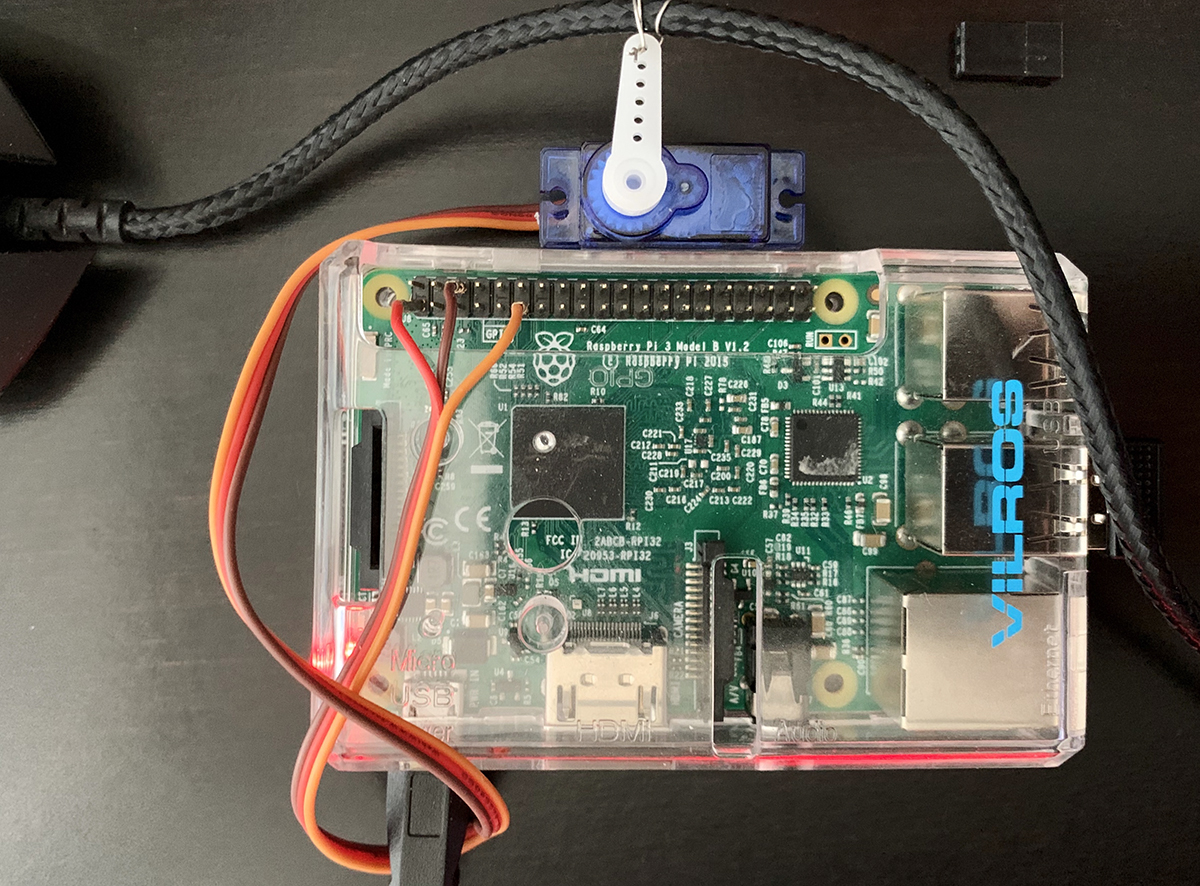
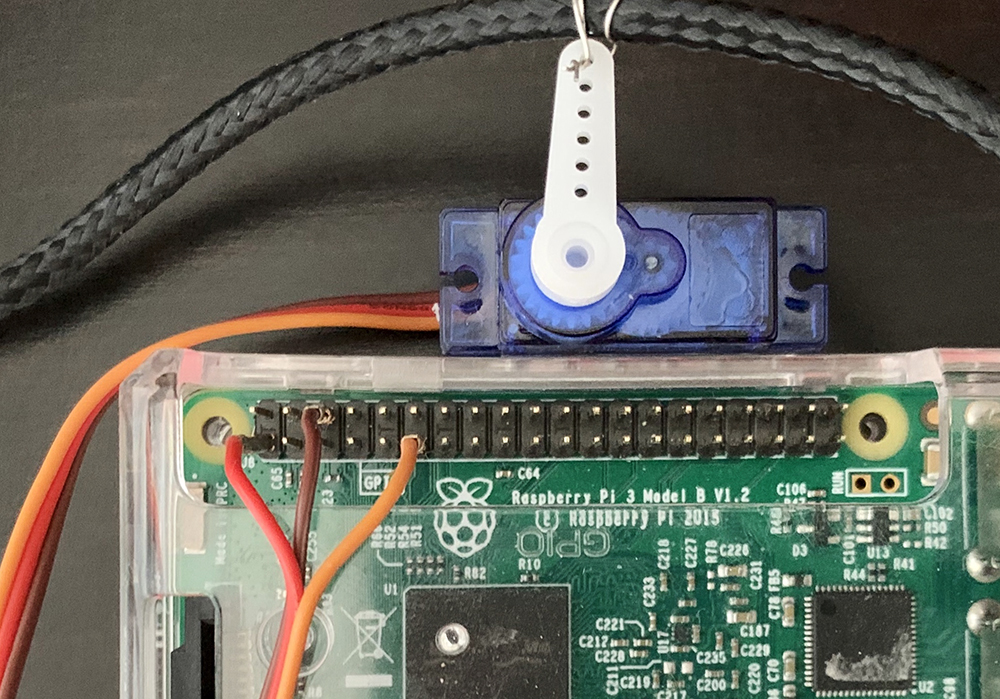
After building this I realized that there are other options out there. I found some software solutions, my Razer includes a macro system through their software suite. There are dongles that will send intermittent signals and there are other mechanical options that physically move the mouse or platform below the sensor. These options didn’t occur to me immediately, I went straight to my box of parts and found a Raspberry pi 3b, a digital micro servo, and an old mouse.
Let’s Get Started
You will need:
1 Raspberry Pi 3 (reference the GPIO pinout for another model)
1 Digital Micro Servo
1 Wired Mouse
Most digital micro servos have a plug that has removal female connectors which can be removed from the plug itself, remove these. Most servos also have a red, white and black plug scheme but some, mine included, have a dark brown, orange and yellow. You will need to review the information about your servo to ensure you know what you’re working with.
You will be using the following pinout:
Pin1 = 3v3 Power
Pin6 = Ground
Pin11 = GPIO17
Incase you aren’t using the Raspberry Pi 3 Model B like me, there is a utility built into Raspbian that is launched through a terminal. Type pinout in a terminal window and you will get useful information about your RPI including a GPIO diagram and some nifty visuals.
pinout
To mount the servo, I just used some double sided tape and attached it to the RPI case. I used some wire to attach the servo horn to the mouse cable about 5 inches from the mouse. Nothing special here so do what works for you. The other end of the mouse connects to the computer.
The Code
So now that we have everything connected, it’s time to make it work. Out of the box Raspbian comes with Python and everything necessary to interact program the GPIO.
We will do this through the terminal and feel free to use your favorite editor but I will be using Nano. For this example we will just create this in our home folder, type:
nano movemouse.py
This will launch Nano and you will be editing mousemove.py. Copy and paste the following into the file and save by typing ctrl-x, y for yes then enter as prompted at the bottom of the window.
import RPi.GPIO as GPIO
import time

servoPIN = 17
GPIO.setmode(GPIO.BCM)
GPIO.setup(servoPIN, GPIO.OUT)

p = GPIO.PWM(servoPIN, 50) # GPIO 17 for PWM with 50Hz
p.start(2.5) # Initialization
try:
  while True:
    p.ChangeDutyCycle(8.5)
    time.sleep(0.5)
    p.ChangeDutyCycle(5.5)
    time.sleep(0.5)
    p.ChangeDutyCycle(0)
    time.sleep(150)
except KeyboardInterrupt:
  p.stop()
  GPIO.cleanup()
I won’t take a long time to explain this, it’s a conversation for another post but basically we enable the script to use GPIO pin 17 and then send it the commands to move the servo to the angle represented by 8.5 then to the angle represented by 5.5 then put it to sleep for 150 seconds.
Now run the script by typing the following. It will re-run until the script is interrupted with ctrl-x.
python mousemove.py
Make It Automatic
To take it one step further and since I’m only using this Raspberry Pi for this task for now, I added the script to my rc.local file so it will run when the RPI boots. You can do this by editing your rc.local file:
sudo nano /etc/rc.local
Then add this line (if you left the file in the referenced directory):
sudo python /home/pi/mousemove.py &
In Conclusion
As I already mentioned, there are a lot of ways to prevent a game or your computer from timing out but this was defiantly a fun way to do it. Let me know if you came up with any ideas with your own project or if you have any questions!